Description
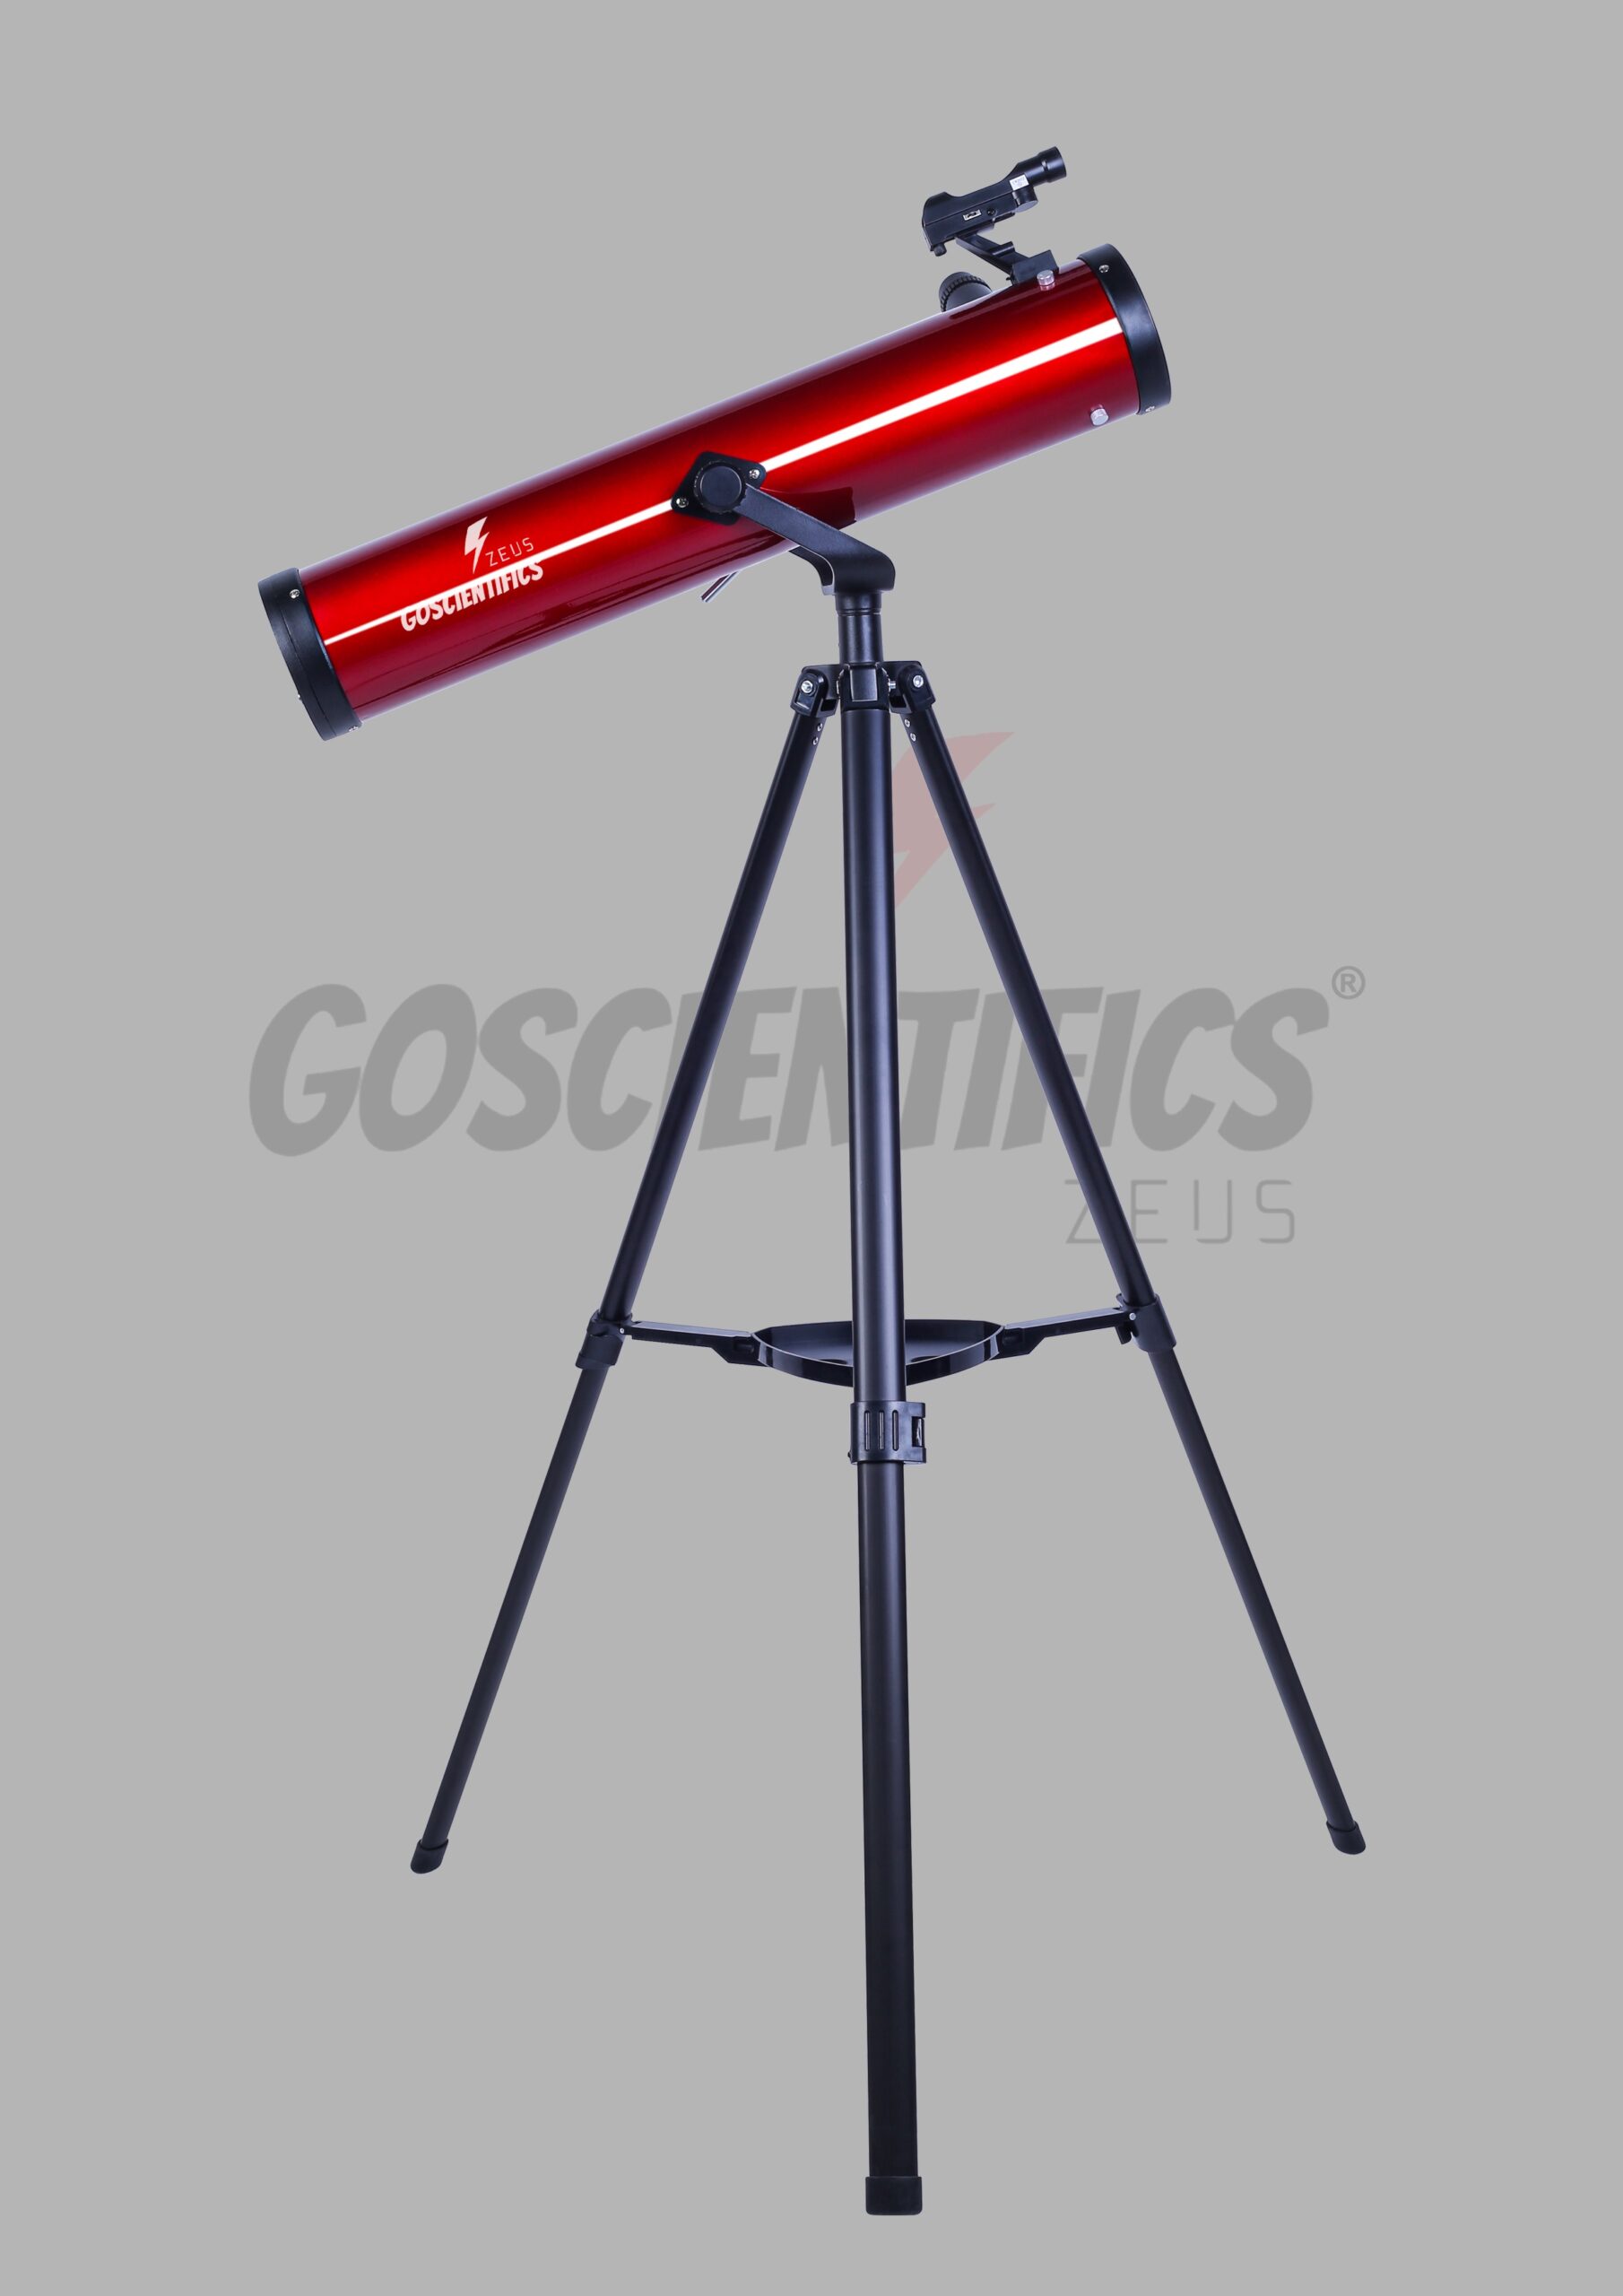
GoScientifics ZEUS 76mm Reflector Telescope
IMPORTANT: THIS PRODUCT IS SOLD OR TO BE RESELLED ONLY WITHIN INDIA
We, Team GoScientifics proudly launch our Olympian Series telescopes. Resembling Olympians, these scopes are crafted to stand high, heroic and honourable.
Named after the Greek god of skies, Zeus is a beckoning Newtonian reflector in bold Black and Red.
With a 76 mm aperture and 700 mm focal length, the tube assembly uses high-quality Aluminium and Silicon-di-oxide coated mirrors. This increases light gathering capacity for crisp, bright images with startling detail.
-
Best for viewingLunar & planetary
-
User levelBeginner
-
Optical designReflector
-
Optical diameter76mm
-
Focal length700mm
-
Focal ratiof/9.2
-
Optics typeSpherical
-
Glass materialSoda-lime plate
-
EyepiecesKellner 10mm,20 mm (1.25″)
-
Resolving power1.52arc*sec
-
Limiting stellar magnitude12.1
-
Finder scopeReflex sight
-
Focuser1.25″ Rack-and-pinion
-
Secondary mirror obstruction19mm
-
Secondary mirror obstruction by diameter25%
-
Secondary mirror obstruction by area6%
-
Mount typeAltazimuth
-
Tube materialSteel
-
Tripod materialAluminum
-
Weight, optical tube3.5 lbs.
-
Weight, mount/tripod2.9 lbs.
-
Weight, fully assembled7.0 lbs.
-
Additional included accessoriesMoon Filter, 2X Barlow
-
1 Year Limited Warranty
Description
We, Team GoScientifics proudly launch our Olympian Series telescopes. Resembling Olympians, these scopes are crafted to stand high, heroic and honourable.
Named after the Greek god of skies, Zeus is a beckoning Newtonian reflector in bold Black and Red.
With a 76 mm aperture and 700 mm focal length, the tube assembly uses high-quality Aluminium and Silicon-di-oxide coated mirrors. This increases light gathering capacity for crisp, bright images with startling detail.

An easy-to-pair red dot viewfinder helps you effortlessly locate and aim at an object in the night sky.
Anodised All-black, heavy-duty, Aluminium tripod comes pre-assembled right out of the box.
The interlocking accessory tray is ergonomically shaped like a Reuleaux triangle to meet the stability and versatility of the tripod.
Top-notch 10 mm, 20 mm Kellner eyepieces, a premium moon filter and a 2X Barlow are included as accessories. Their full metal body and full glass lenses are made to intensify your encounter with stars.
This exemplary beast can award a beginner great views of the Moon, Rings of Saturn, the Moons of Jupiter, stars, planets and constellations.
Now, Get ready to hunt stars.
GoScientifics Zeus. No Fear. No Limits.
Assembly guide
Greetings from GoScientifics. Welcome to GoScientifics Zeus telescope assembly guide.
Let us first examine the telescope parts.
Tripod with Accessory Tray.
Telescope Yoke Mounting Arm
76mm Optical Tube Assembly
Red Dot Viewfinder
Altitude Adjustment Rod
Azimuth Wheel
Focuser
1.25” Eyepieces (10mm and 20mm)
Moon Filter
2X Barlow
Note: We recommend assembling your telescope for the first time in the daylight or in a lit room so that you can familiarise yourself with assembly steps and all components.
• Open the tripod until the tripod spreaders are level. Put the accessory tray in place and turn it to lock it into place. Set the tripod height by adjusting each leg with its locking clamp.
• Insert the yoke mounting arm from above into the opening in the tripod head and secure it in place by tightening the screw.
• Attach the altitude adjustment rod to the telescope tube.
• There are two plates on either side of the telescope tube. To attach the telescope tube to the yoke mount position the tube so these plates slide into the slots on both sides of the yoke mount and tighten the locking screws until snug. Be careful not to over-tighten.
• Attach the locking screw for the altitude adjustment rod to the tripod head yoke.
• Slide the red dot viewfinder into the finder bracket that is already mounted on the telescope tube.
- Place your chosen eyepiece into the focuser and secure it by tightening the setscrew. Be careful not to over-tighten.
Now let us learn how to use the Red Dot Viewfinder
The viewfinder is powered by a CR-2032 battery that is included. Before using the viewfinder for the first time, remember to remove the plastic insulator that is blocking the battery from connecting.
For the viewfinder to be effective, it must be aligned.
To do this:
- Insert the 20mm eyepiece into the diagonal and power on the viewfinder by sliding the switch on its right side to an “On” position.
• Point the eyepiece at an easy target like a pole and centre the object in the eyepiece.
• Without moving the telescope, position the red dot using the two adjustment screws so that it shares the same view as the one in your eyepiece. Your viewfinder is now aligned.
Note: To preserve battery life, don’t forget to turn off the viewfinder after use.
When it is time to replace the battery, remove the battery cap by loosening the set screw. Take out the old battery and slide a new battery in place with the positive side showing. Replace the cap, and tighten the set screw.
The Red Dot Viewfinder is powered by a battery type CR-2032 (3V); if a replacement is necessary, remove cap by unscrewing set screw and sliding battery towards the front. Slide new battery in place with the positive (+) side showing. Replace cap and tighten with set screw.
After you have aligned your viewfinder, you are ready to start observing!
Put the 20mm eyepiece into the diagonal to get the widest field of view. This wider field of view will make it easier to locate and track objects.
To move your telescope up and down, use the altitude adjustment rod.
To move your telescope from side to side, use the azimuth wheel on the mount head.
To move your telescope to an observing target or make coarse adjustments, loosen the locking screws on both controls while holding the telescope firmly near the focuser.
Slowly move the telescope to the position of the desired object, then tighten the controls until snug. Do not over-tighten.
Centre the object in the viewfinder by making slight movements to both the altitude adjustment rod and the side azimuth wheel.
Once centred, you should be able to view the object through the eyepiece and continue to make minor adjustments using the altitude adjustment rod and azimuth wheel.
It is important to remember that the rotation of the Earth means objects will move out of your eyepiece fairly quickly. Once you have found and focused on your desired target, you can track it as it journeys across the night sky using the slow motion control on the mount head.
For a closer look at an object, you can insert the 10mm eyepiece.
When observing the moon, the moon filter can be screwed on the inside of the eyepiece.
When high magnification observation is required 2X Barlow multiplier can be inserted between the eyepiece and the focal length.
A word of caution, never use this device to look directly at the Sun or in the direct proximity of the Sun. Doing so may result in a permanent loss of vision.
Also, When using this device, respect the privacy of other people. For example, do not use them to look into people’s homes.
Enjoy your star hunting session with GoScientifics Zeus.